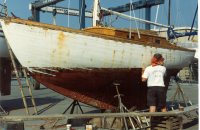
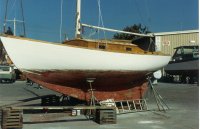
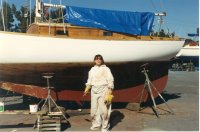
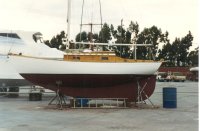
By 1993 I had redone the varnish, stripped the mast of paint, refinished and refastened the mast (one of the first dates with my future wife), rebuilt the sliding hatch, the usual stuff. One day while sailing in Redwood Creek I noticed the boats around me were suddenly sailing much faster than we were. Upon looking down the companionway I noticed sneakers floating. Looking over to the starboard side I saw water sheeting down the inside of the planking. We were sinking. Knowing the boat didn't take on water while at the dock, I figured the topside planking had dried out allowing the water ingress. We quickly turned around. The wind from astern allowed the boat to stop heeling and the bilge pump to catch up.Shortly thereafter I sailed the boat (on a calm day) to San Francisco Boat Works for a long overdue haul out.
Fall in San Francisco is the best time of year to be there. The days are warm, the wind is light and rain is still infrequent. The following galleries shows the repair work.
Mouse over pictures to see captions, click on the picture to see a larger version, slideshow is also available.
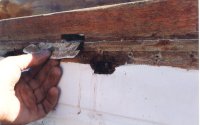

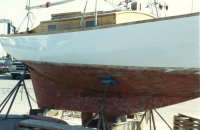
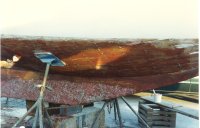
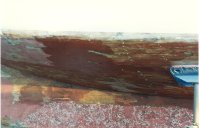
The damage from decay (rot) can be shown during these pictures. somewhere along the line someone tabbed fiberglass from the deck to the sheer strake (top most plank). Covered by the rub rail, the moisture captured under the fiberglass accelerated the decay around the fasteners. At this point I also caulked the seams of the topsides with a urethane caulk like Sika 291 LOT.

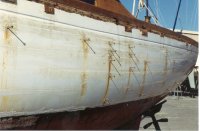
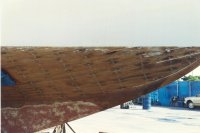
As you saw in the gallery above the source of the bleeders was the iron screws. Since the heads of most of the screws were rusted to nothing and UnScrewUms were not yet invented all that could be done is to soak the fastener with CPES, mark the location of the new screw with a pencil, Fill the hole with Fill-It, then counter bore a new screw hole, screw in new fastener, then bung the hole. I used stainless steel screws since it it the closest in nobility to iron to prevent galvanic corrosion.
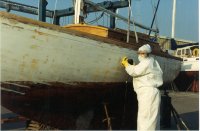
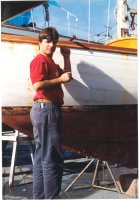
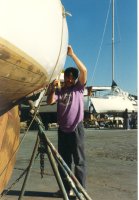
Sanding and fairing is the long process (like the next sentence) of getting a good paint job. The process involves starting with a block plane to remove excess wood (Dutchmen), Chisels (bungs), 100 grit paper (flattening and material removal), applying fairing compound to fill in groves and imperfections, sanding with 120 grit, more fairing putty, sanding with 180 grit, first coat of primer, sanding with 220 grit, fairing putty, second coat of primer, sanding with 220, first coat of top side paint, sanding with 220, second coat of top side paint. At this point you should have a good looking coat. If the gloss has dulled (perhaps applied too late in the day or if fog developed) sand again then another coat. repeat until your satisfied with the paint job.


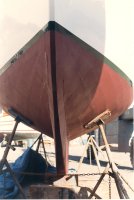

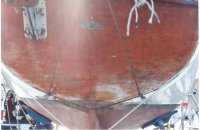
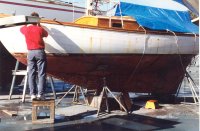
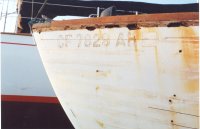
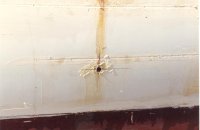
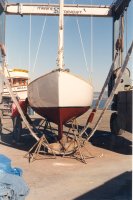
Now that the top sides are done the bottom can be started. The first thing I did was removal of all the anti-fouling paint. Back then all that was available was caustic paint stripper. Not fun! Again I pulled bad fasteners and installed stainless screws. I reefed (removed) out all the old caulking compound but left the cotton. The instructions on the bedding compound called for having anti-fouling paint in the seams before applying the compound. One of the most painful parts of the whole haul out process is troweling in the Interlux wooden boat seam compound. After recovery time from the wrist damage, the next coat of anti-fouling paint is added.
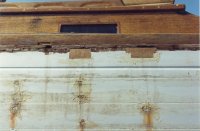
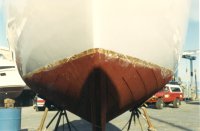
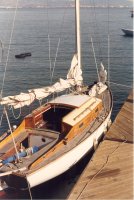
The transom is next. Apparently over the previous 34 years the planking to transom seam has been worked over a lot. I stripped the transom of varnish, applied a coat of epoxy, and varnished. I used 3M 4200 to fill the seam. Finally the boot stripe is added.


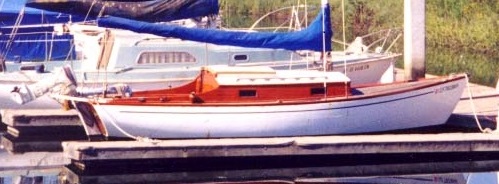
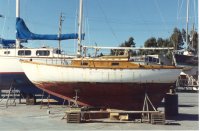
Finally time to relaunch. Usually a boat haul and repaint (fiberglass) is about a week. The duration of time from Nada Bear's haul out to launch was six weeks. I worked about four hours a day, four days a week, Emily and I worked on the weekends for about another 6 hours a day. All this time folks would ask if she was a Bear Boat. A Bear Boat is a class of boat designed, built and sailed (raced) in the San Francisco bay area early in the 20th century. Many Bear Boats are still sailing. Since this boat may look like a Bear Boat its not. After answering this question for a couple of dozen times, the phrase Not a Bear stuck. Hence her name, Nada Bear.
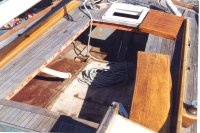
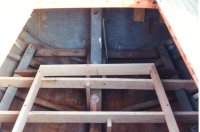
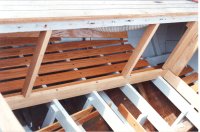
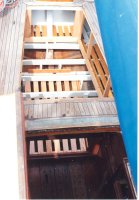
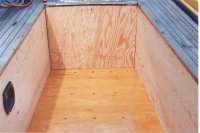
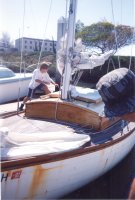
During the haulout I removed the cockpit. The boat was not designed to have an outboard engine attached to the transom. This caused the boats trim to be heavy aft. The cockpit did not drain properly. The scuppers (drains) were located in the forward part of the cockpit sole. The water pooled in the aft of the cockpit and never drained. Soooo, the cockpit had rotted out. I also discoverd a few frames that needed sistering in the aft section. After sailing back to the dock in Redwood City, I put in the new cockpit making sure to raise the sole so it drains properly.